
Hello readers. Hope you’re well.
Today’s post is a quick How to on how to deploy an AudioCodes Virtual Edition (VE) Session Border Controller (SBC) in Microsoft Azure. This is the first of a series on the AudioCodes SBC (hopefully).
Background
First, a little background info. AudioCodes have been around forever, it seems, in the Microsoft UC space.
![]()
My fist dealings with them were during a project to upgrade Lync 2010 to Lync 2013 and add Enterprise Voice, connecting to an ISDN 30 and a PBX. It was a fairly standard build to interconnect Lync to the PBX and enable cross system calling as well as inbound and outbound PSTN calling for both systems. Some users remained on the Avaya and the rest moved to Lync. This customer also had cloud numbers from their carrier. Basically, their real published numbers were hosted in the cloud and these routed to their PRI and presented to fake numbers assigned to users. The Avaya SBC had some transformation tables to manipulate numbers on the way in and route to users and then on the way out to mask the numbers.
It took some work, but everything worked perfectly. It was my first AudioCodes gateway and once I figured out all the concepts it was pretty easy to configure.
Of course gateways and SBCs are just one piece of a giant list of products and services. AudioCodes has gateways that range from very small, 60 voice channels to the obscenely large at 50,000. Gateways and SBCs are a big part of what they do. But they do a lot more besides. Fair to say that AudioCodes has one of the broadest ranges of products for telephony and UC in the market.
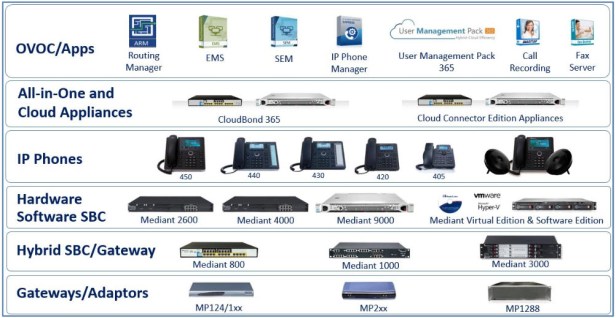
As you can see, they have low to high density analog gateways, telephony and UC gateways and SBCs, a big range of IP phones, appliances including Skype for Business in a Box and a huge suite of applications from call recording to appliance and estate management.
For more information on AudioCodes products and services reach out to your UC partner or telephony provider, or have a look at their website. https://www.audiocodes.com/
On with the show!
Set up an Azure account
AudioCodes VE SBCs can be deployed in AWS or on-premises on your own virtual estate. This is a quick step by step how to guide on deploying an AudioCodes Virtual Edition SBC in Azure. And I do mean quick. AudioCodes have a template in the Azure Marketplace which means you can be up and running pretty quickly.
Setting up an Azure account is free. You only pay for what you use. Sign up here. Bookmark the post and come back here when you’re done.
The deployment
Now that you have an Azure account, you’re ready to deploy your SBC.
First, log in to Azure and click on create a resource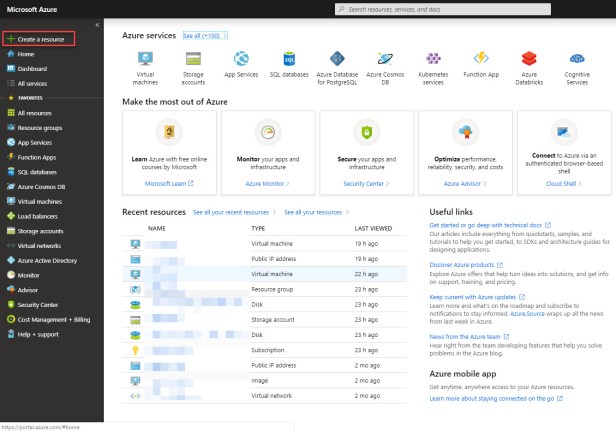
Search for AudioCodes and select the Mediant VE Session Border Controller (SBC) from the list
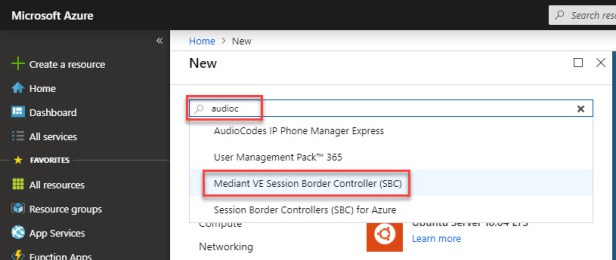
Click create to open the deployment wizard

The deployment wizard has 5 steps to complete
Step 1 – The Basics
Give your virtual machine a name.
If you use capital letters in your virtual machine name (e.g. AudioCodes-SBC-01), it has consequences later on which I learned the hard way. More on that later.
Pro tip: Use lowercase letters for the machine name!
Assign a Username and password.
It goes without saying that your password should be long and complex. If you use a password manager, get that to generate a cruel and unusual password and then let it save in the manager so you never need to remember it or enter it for that matter.
Choose your subscription. Mine is Pay-As-You-Go.
Create a new Resource Group – click on Create new and give it a name
Then choose your location
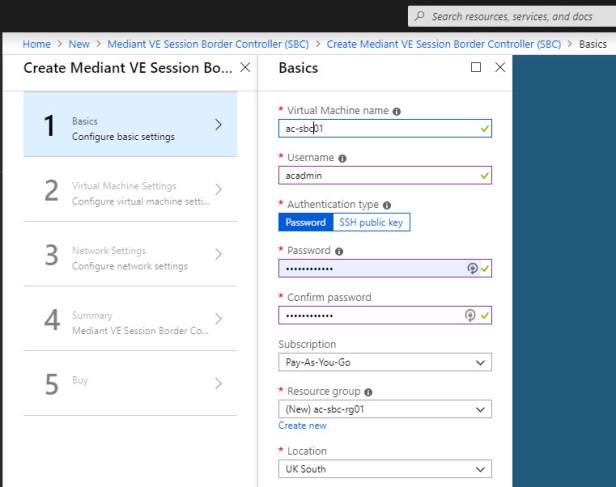
When you’re done, press OK to move on to Step 2
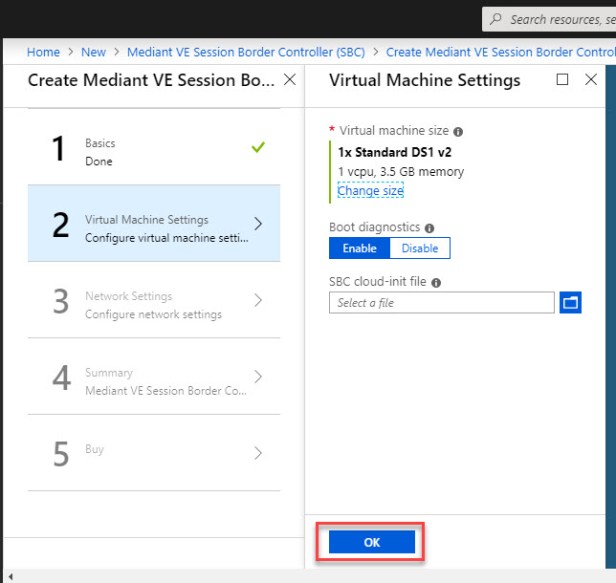
Step 2 – Virtual Machine Settings
Just click OK and move to step 3
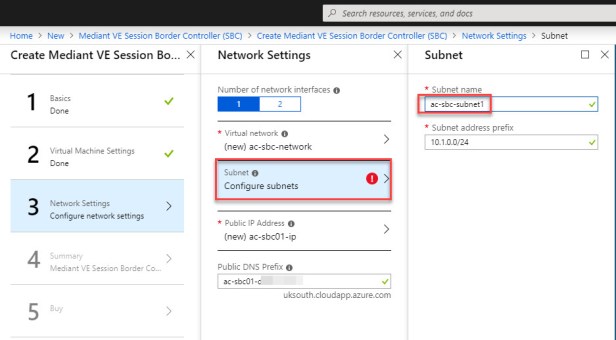
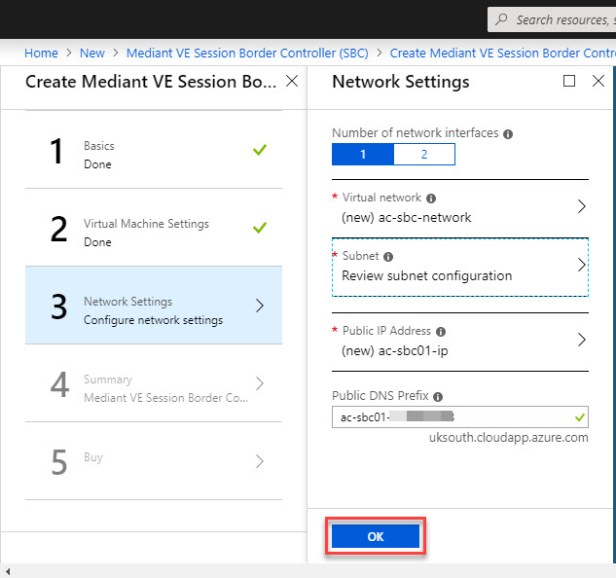
Step 3 – Network Settings
Create a new virtual network or if you have other services deployed, choose an existing one.
I chose to create a new virtual network. Give the network a name. You don’t need to be specific to the services that will be deployed in it especially if you are going to put more servers and services in here.
Configure your address space. By default, the address space is configured as a /16. You can leave it there or change to a /24 if you don’t need that many addresses.

Configure your subnet and give it a name.
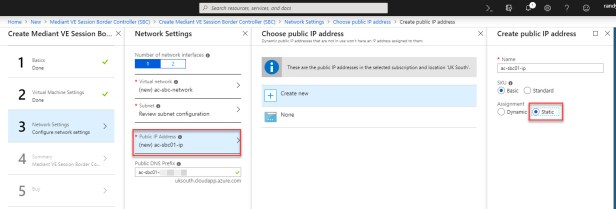
Click on Public IP Address

Choose Static on the right to assign your resource a static IP
This is where I said you would see consequences for using capitals in your Virtual Machine name. The wizard creates a public DNS record to use to access the resource. The prefix is made up of the virtual machine name and a bunch of random letters and numbers. If there are capitals in the name you will get an error and OK will be grayed out.
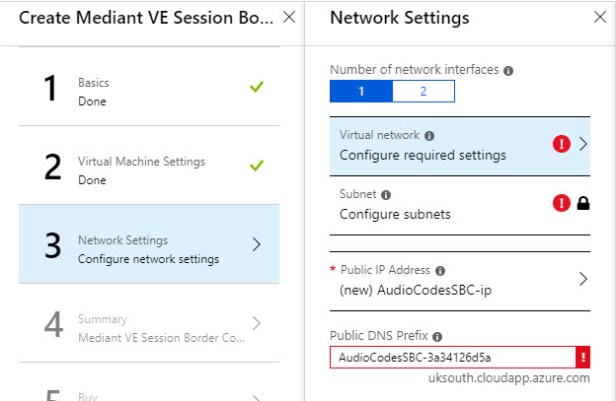
The warning states that
“The Public DNS Prefix is invalid and that it must conform to the following regular expression: ^[a-z][a-z0-9-]{1,61}[a-z0-9]$”
Now press OK to move on to Step 4
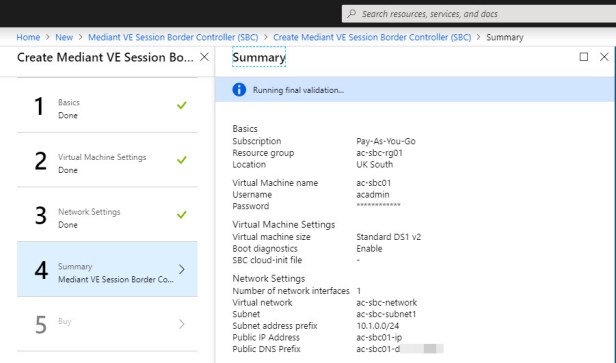
Step 4 – Summary
Step 4 validates the configuration
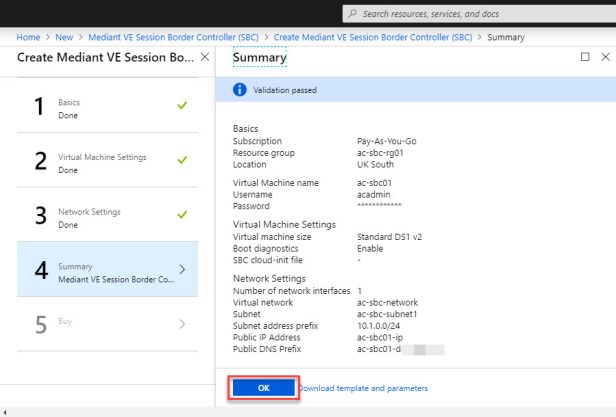
Once validation has passed, click OK to move on to Step 5
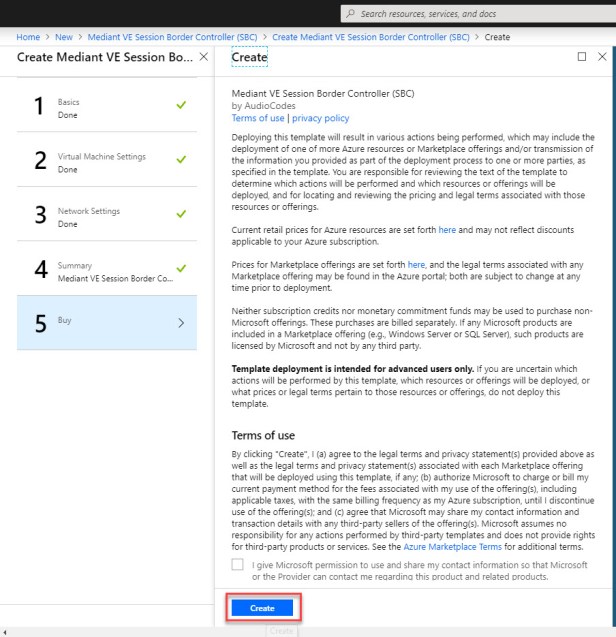
Step 5 – Buy/deploy
Now click Create to deploy and buy the service in Azure.
Once you click create you will see a notification popup that says the deployment request has been submitted.
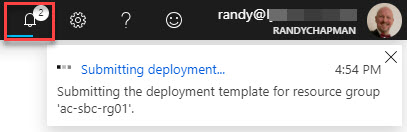
If you click on the notification button you will see the event listed. Click on the event for more detail.
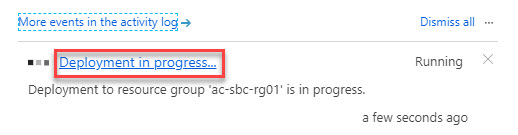
The next screen is the deployment overview and progress
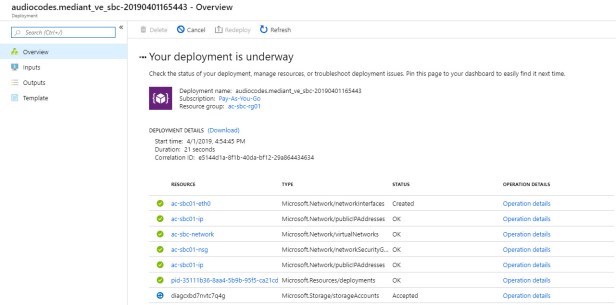
You will see the resources being added one at a time while the deployment is underway.

You will get a confirmation that the deployment is complete. As you can see it is pretty quick at just 2 minutes and 51 seconds.
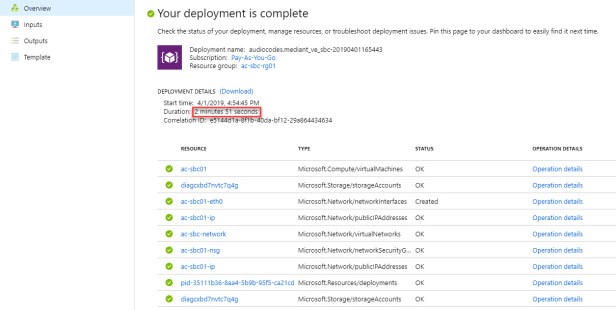
Go back to your Azure home page and click on Virtual Machines to see your machine in the list.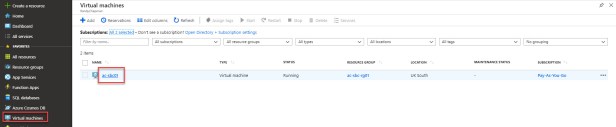
Click on the machine name to go to the machine overview. As you can see, once deployed, the machine is running and ready.
Make a note of or copy the public IP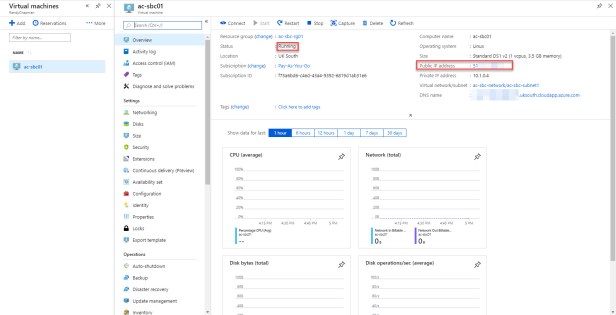
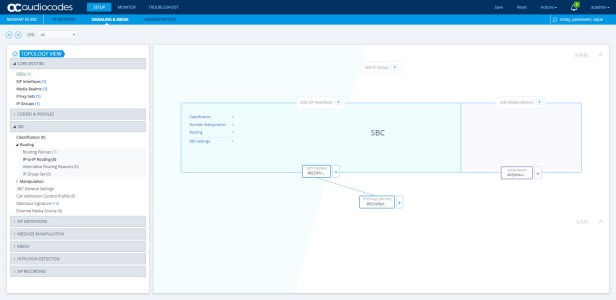
Open a new tab in your browser and browse to the public IP. Now enter the username and password you set back in Step 1 or the deployment wizard.
This is the the web UI of your new SBC. As you can see, completely un-configured.
That’s all folks!
Wrap up
I hope you found that useful. As I said, I want this to be part of a series which will include some configuration guides. I also have a shiny new AudioCodes IP phone to review. I’ll post links here when I’ve published more. Stay tuned.
Once again, if you want to know more about AudioCodes products and services contact your UC or telephony provider. Or have a look at their website https://www.audiocodes.com/.
If you want to start learning Azure there are a bunch of resources on the Microsoft site including free in-browser access to Microsoft tools and modules. https://docs.microsoft.com/en-us/learn/azure/
Discover more from
Subscribe to get the latest posts sent to your email.

Hi Randy
I am aware…this post is almost history 😉
Are you already posted the second part with Audiocodes configuration?
THX Markus
LikeLike
I never got around to blogging that. But I have one set up and working. Here’s a great post by a colleague and fellow MVP https://www.lee-ford.co.uk/teams-direct-routing-with-an-audiocodes-sbc/
LikeLike