

Hello Readers, I hope you’re well.
This is a very long post so I’ll get right to it. In this post I’ll show you how to install Verint Verba Recording for Microsoft Teams.
Background
It’s no secret that Microsoft has been working on releasing some APIs for Teams which will allow software vendors to create solutions to integrate and enrich Microsoft Teams. Verint Verba is one of several vendors working with Microsoft to develop against and leverage the APIs for recording.
The latest release from Verint Verba (version 9.5) includes the Verint Verba Microsoft Teams Bot. This new Recording Bot accesses & integrates to Microsoft Teams using the Microsoft Graph API and the Microsoft Local Media SDK.
Verint Verba’s recording solution for Microsoft Teams allows customers to record and archive voice, video, screen and application sharing and chat.
It records calls using a Bot which is hosted on a Verba recording server in Azure and loaded into Teams as an application. This bot connects to your Teams tenancy using the calling APIs which are still in public preview. Verba records users’ calls by conferencing in the Teams Recording Bot and streaming the media to the recording server for processing and storage.
| Just a quick note to say that although Verba version 9.5.0 supports Teams recording and the APIs are in public preview, this solution should NOT be considered as generally available. ⚠ Teams Recording with Verba is available for lab or PoC deployments only at the moment: Microsoft Teams Recording capabilities are contingent on the general availability of the Microsoft Teams Calling API. |
Lets get started
What you need
- A Microsoft 365 subscription with Microsoft Teams enabled (should be obvious)
- Admin rights to your Microsoft 365 subscription – Teams Service admin as a minimum
- An Azure subscription – this is for the recording “bot” and in my case, the Verint Verba server
- The right to create a virtual machine in Azure – Virtual Machine Contributor role as a minimum
- Access to manage public DNS for your domain
- A public SSL certificate
How to do it
Step 1 – Create a virtual machine
Again, you’ll need to have the Virtual Machine Contributor role as a minimum. This virtual machine will be used to host the Verint Verba Microsoft Teams recording bot as well as the Verint Verba recording role or in my case, recording and web server roles.
The Verint Verba Microsoft Teams Bot is installed as a Windows service and is part of the Verba installer in Combo and Recording Server Roles. The bot service is part of the Verba framework, managed by the Verba Web Application, monitored and maintained by the Verba System Monitor.
Browse to https://portal.azure.com. On the home screen, click Virtual Machines and Create

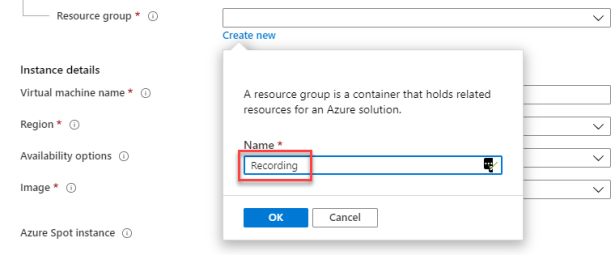
Pick your Azure subscription and create a new resource group
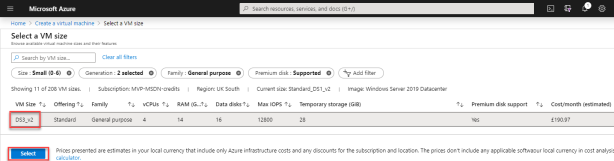
Give your VM a name. Choose your region (nearest to your Teams tenant). Select Windows Server 2019 Datacentre as the image. And change the size to Standard DS3 v2

This is the spec and UK cost per month estimate for this server. And this is before you add additional storage if you want to store recordings locally.
Set up an admin account and password and allow RDP inbound. Then click next

Optional – If you are going to store recordings on this server, you’ll need storage. Create and attach a new or existing disk

Leave the networking as is and let Azure create a new virtual network, subnet and public IP or change it if you have your own way to set it up. Leave everything else as is and click Review + Create

Validation should pass. Now click Create

Watch the progress if you want. It shouldn’t take long to complete

Once your machine is created, click Go to Resource

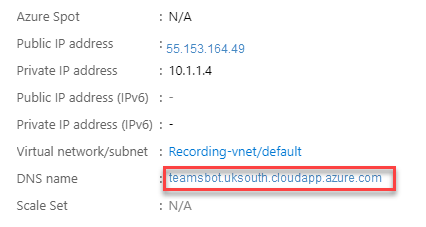
Click on the Configure link next to DNS name and specify a DNS name to use for your bot. Make a note of the full DNS name because you’ll need it later when you create a CNAME record.

Open some ports
There are three mandatory ports required for communication between the recording bot and the Microsoft Teams platform.
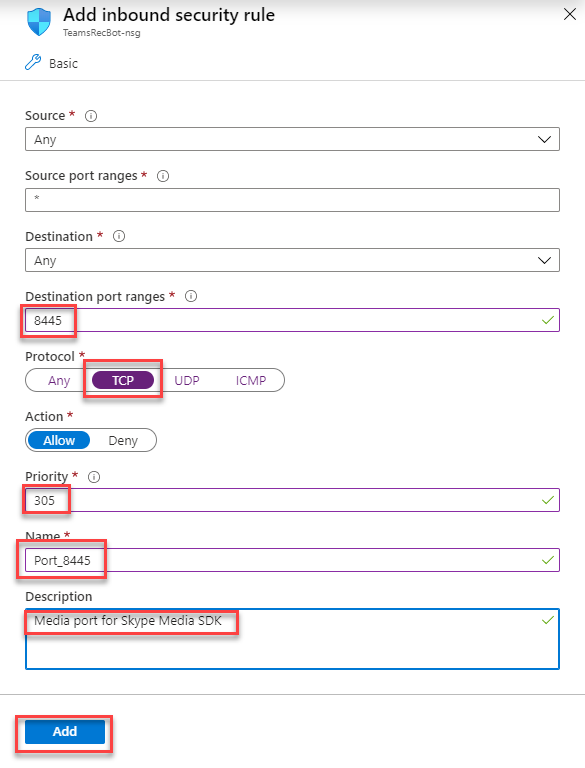
- 8445 TCP – Media port for Skype Media SDK
- 9440 TCP – Teams Signaling/Notification #1
- 10100 TCP – Teams Signaling/Notification #2
There are three optional ports related to Verba service communications which are only required when the main Verba server is deployed on-premises (not in Azure).
- 4433 TCP – Verba Node Manager Connection
- 10501 TCP – Verba Recording Director Connection
- 10502 TCP – Verba Media Recorder Connection
If, as in my case, this is the only Verba server and you install it as a “combo server”, you will need to allow TCP port 443 inbound to be able to access the Verint Verba web interface.
To add the ports, click on networking -> add inbound port rule

Add rules for TCP 8445, 9440, 10100 and 443 (see below)


Once done it should look like this

Step 2 – Configure the server
Now to configure the Server. This includes Adding some Firewall rules in Windows firewall, requesting and installing a public SSL Certificate and binding the SSL Certificate to specific ports.
Add the Firewall rules to the server
The following ports are required for Verint Verba services
- 80 TCP
- 443 TCP
- 4433 TCP
- 8445 TCP
- 9440 TCP
- 10100 TCP
- 10501 TCP
- 10502 TCP
Log into your virtual machine using RDP and open an elevated PowerShell or ISE and run the following commands to create the new inbound rules and verify they’ve been created.
# Add the rules
New-NetFirewallRule -displayname 'Verba Web HTTP' -direction inbound -action allow -protocol tcp -LocalPort 80
New-NetFirewallRule -displayname 'Verba Web HTTPS' -direction inbound -action allow -protocol tcp -LocalPort 443
New-NetFirewallRule -displayname 'Verba Node Manager' -direction inbound -action allow -protocol tcp -LocalPort 4433
New-NetFirewallRule -displayname 'Verba Teams Bot Media' -direction inbound -action allow -protocol tcp -LocalPort 8445
New-NetFirewallRule -displayname 'Verba Teams Bot Signaling 1' -direction inbound -action allow -protocol tcp -LocalPort 9440
New-NetFirewallRule -displayname 'Verba Teams Bot Signaling 2' -direction inbound -action allow -protocol tcp -LocalPort 10100
New-NetFirewallRule -displayname 'Verba Teams Bot Recording Director' -direction inbound -action allow -protocol tcp -LocalPort 10501
New-NetFirewallRule -displayname 'Verba Teams Bot Media Recorder' -direction inbound -action allow -protocol tcp -LocalPort 10502
# Verify
Get-NetFirewallRule -Displayname "*verba*" | select displayname,direction,action
#
I use ISE and I saved it as a PS1. Then just click Run or press F5 to run it

Next, request and import an SSL certificate
The Microsoft Teams bot requires an SSL certificate because the signaling ports are HTTPS web servers and the Teams platform will only send media to a trusted endpoint. The SSL certificate needs to be issued by a public trusted Certificate Authority. If this certificate is only going to be used for this one application you can use yourbotname.domain.com. If you’ll use it for other things, you can use a wildcard cert *.domain.com.
Once issued, import the certificate to the personal store. When you import the certificate make sure you tick “Mark this key as exportable”.


Finally, bind the SSL Cert to the ports
Now you need to bind the SSL certificate to the ports. The Teams Bot runs 2 HTTPS listeners for receiving signaling from the Teams platform. Both
listeners are started by a system service running under PID 4. This service requires the certificate bound to the listener ports.
To do this you need to use netsh. The command you run is made up of a few parameters including:
- ipport – which is your local IP and signalling port
- certhash – which is the thumbprint of the SSL certificate you imported in the previous step
- appid – this is a random GUID
Rather than find those parameters and paste into a command to run, I put together a little script which collects the information to use as the parameters, including reserving a GUID.
Open an elevated PowerShell or ISE and run the following. Be sure to replace YOUR_CERT_SUBJECT with the subject from your cert. e.g. your domain.
# Get the local IP address
$ipv4=(Test-Connection -ComputerName $env:computername -count 1).ipv4address.IPAddressToString
# Concatenate IP and Port
$ipport1=$ipv4 + ":9440"
$ipport2=$ipv4 + ":10100"
#
# Get the Certificate hash
$Thumb=Get-ChildItem -Path Cert:\LocalMachine\My | Where-Object {$_.Subject -like "*YOUR_CERT_SUBJECT*"} | Select-Object -ExpandProperty Thumbprint
#
# Generate a new GUID
$guid=New-Guid | select -ExpandProperty guid
#
#
netsh http add sslcert ipport=$ipport1 certhash=$Thumb appid="{$guid}"
netsh http add sslcert ipport=$ipport2 certhash=$Thumb appid="{$guid}"
#
#
netsh http show sslcert

Step 3 – Register the bot
The steps include:
- Create a DNS entry for the bot
- Register the Bot Channel
- Consent to Bot permissions
- Add the Bot as an application to Teams
- Add Recording policies
Create a public DNS entry
Create a DNS CNAME entry in the domain which the SSL certificate issue for. E.g.: teamsbot.domain.com. The CNAME entry needs to point the DNS name of the previously created VM. e.g. teamsbot.uksouth.cloudapp.azure.com
| TYPE | NAME | VALUE | TTL |
| CNAME | teamsbot | teamsbot.uksouth.cloudapp.azure.com | 1 hour |
Registering The Bot
Log in to azure and Search for Bot Channel Registration

Complete the registration form
- Bot handle: Unique name
- Select subscription
- Select resource group
Click Create button and Wait until Azure deploys the channel registration

Go to the Bot Services and select the previously registered Bot Channel. Click on ‘Channels’

In ‘Add a featured channel’ section select Teams

Go to ‘Calling’ tab. Check ‘Enable calling’ option and add a Webhook URL. The webhook URL needs to use the previously created DNS CNAME entry and point to the public signaling port #1.
E.g. https://teamsbot.domain.com:9440/api/calling
(The /api/calling endpoint is a bot specific HTTP endpoint where bot is waiting for HTTP request from the Teams platform)

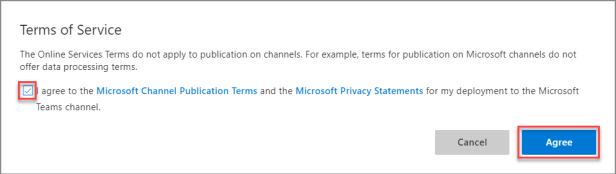
Click ‘Save’ button and Agree to the T&Cs
Click on Settings and make a note of the Microsoft App ID because you need that later. Now click on Manage by Microsoft App ID

Go to Certificates & secrets and click on ‘New client secret’

Give it a name ans set the expiry to never and Add
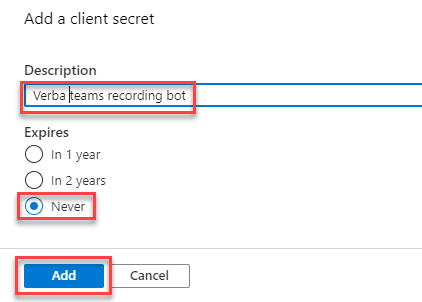
Now take a note of the new client secret (needed later).

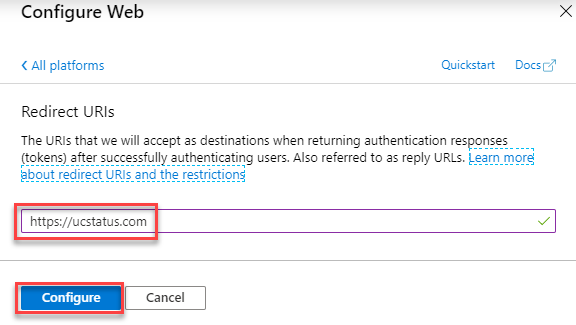
Go to Authentication and click on ‘Add a Platform’

Click on Web

Add a “Redirect URI”. For web applications, use the base URL of your application. e.g. https://domain.com
I used the domain for my blog as the Redirect URI (https://ucstatus.com) just so I got redirected to a valid page. The actual URL doesn’t matter. It’s just where you’ll land once you accept the permissions which comes later. Take a note of what you set for the redirect URI (because this is needed later)
Click Configure and Save
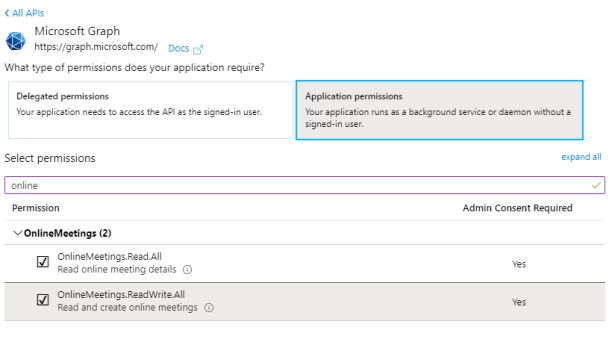
Go to API permissions -> Click on ‘Add a permission’ -> Select ‘Microsoft Graph’

Select Application permissions and add the following permissions:
Calls
- Calls.AccessMedia.All
- Calls.Initiate.All
- Calls.InitiateGroupCall.All
- Calls.JoinGroupCall.All
- Calls.JoinGroupCallAsGuest.All

OnlineMeetings
- OnlineMeetings.Read.All
- OnlineMeetings.ReadWrite.All
User
- User.Read.All
- User.ReadWrite.All

- After adding all permissions the list should look like this:
see screenshot

Grant ‘admin consent’ to the permissions
All assigned permissions need admin consent in the Teams tenant. You’ll need to build a specific URL which includes the Redirect URI (the one you used in the above step), the Tenant ID & Client ID a.k.a. App ID. Both IDs can be found under App Registrations.
- Go to Azure Active Directory -> App Registrations
- Click on the previously created bot
- On the Overview page both ID can be found

Construct the consent URL
Replace the {tenant_id}, the {client_id} and the {redirect_uri} with the proper values.
NOTE: Remove the {} around tenant, client_id and redirect_uri
Paste the URL into a browser. The Microsoft portal will request a login. Login with an administrator. You’ll be prompted to accept the permissions

Then get redirected to your {redirect_uri}?admin_consent=True&tenant={tenant}&state=12345
Mine looked like this

Step 4 – Add the bot to Microsoft Teams
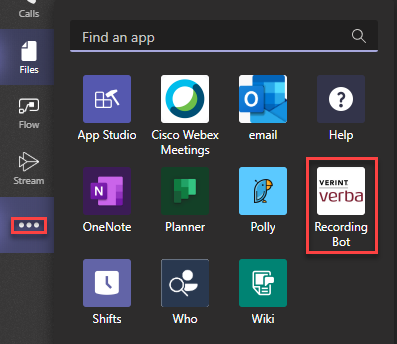
For this step you’ll need to use the App Studio. If you don’t have the app studio installed in Teams, go add it now. Click on the ellipses menu and search for app studio. Then install

Open App Studio

Click on Manifest Editor

Complete the details shown below.
- Give it a short and long name
- Generate an App ID
- Under package name use com.verba
- Version 9.5.0
- Give it a short and long description

Scroll down and enter Verba in the name and under website, privacy statement and Terms of use, enter https://www.verba.com

The branding is mandatory as well. Find the logo on the interweb and use a vector graphics tool such as Snagit to save two .jpg versions of the logo. One at 192×192 and the other at 32×32. Then choose the accent colour. I used the official colour from the logo, #7D2133. Use whatever logo and colour you want.

Now under capabilities, click on ‘Bots’ -> and Set up

Click ‘Existing bot’ -> tick ‘Select from one of my existing’ -> Choose your bot in the drop down list -> tick everything under Calling bot and Scope -> press Save

This is the summary

Click on ‘Test and distribute’ -> then click ‘Install’

Click Add to install and add the bot to Teams

And you’ll see the bot listed under apps

Step 5 – White list the App & Create a Compliance Policy
Connect to Skype Online PowerShell
The next part is done in PowerShell using the SkypeOnline PowerShell module. Open an elevated PowerShell or ISE. Authenticate and connect to a new Skype for Business Online PowerShell session
# Variables
$Username = “admin@yourdomain.com”
$Password = cat “C:\Password.txt” | ConvertTo-SecureString
$Credentials = New-Object -TypeName System.Management.Automation.PSCredential -ArgumentList $Username, $Password

# Connect to a new session and import it
$SfBOSession = New-CsOnlineSession -Credential $Credentials
Import-PSSession $SfBOSession -AllowClobber -erroraction silentlycontinue -warningaction silentlycontinue

# Silently Continue after the hour is up
Enable-CsOnlineSessionForReconnection
#
#
White list the app
Next, run this command to add the bot as an application. e.g. New-CsOnlineApplicationInstance -UserPrincipalname <UPN> -DisplayName <displayname> -ApplicationId <botAppID>
- The UPN should be a unique name for the bot e.g.: recordingbot@domain.com.
- The DisplayName will be displayed in the Teams client (will be hidden later) e.g. Recording Bot
- Application ID: The saved App Id from the previously created Bot channel registration
New-CsOnlineApplicationInstance -UserPrincipalname recordingbot@domain.com -DisplayName "Recording Bot" -ApplicationId 7b91a753-8c3b-4537-ba0c-6a9146e58249
The command should return the successful registration. The result contains the Object ID – save it for the next command
Sync-CsOnlineApplicationInstance -ObjectId 7ceb4j9e-68f4-482f-9467-c3bdd787f5b7

Create Compliance recording policy
You can probably tell by now that I like a PowerShell script. Just run this to create the recording policy and the recording application for the policy.
# Create Compliance recording policy
# Variables
$tenantID = (Get-CsTenant).TenantId
$PolicyDesc = "Verba Recording for Teams"
$PolicyName = "VerbaTeamsComplianceRecording"
$ObjectID = Get-CsOnlineApplicationInstance | where-object {$_.DisplayName -like "*recording*"} | Select-Object -ExpandProperty ObjectID
#
# Create the new Recording Policy
New-CsTeamsComplianceRecordingPolicy -Tenant $tenantID -Enabled $true -Description $PolicyDesc -Identity $PolicyName
#
# Create and set recording application for the policy
Set-CsTeamsComplianceRecordingPolicy -Tenant $tenantID -Identity $PolicyName -ComplianceRecordingApplications @(New-CsTeamsComplianceRecordingApplication -Tenant $tenantID -Parent $PolicyName -Id $ObjectID)
#
# Verify
Get-CsTeamsComplianceRecordingPolicy | Where-Object {$_.Identity -like "*$PolicyName*"}
#
Now, Grant the policy to one or more users
Grant the policy to a single user
# Grant the policy to a single user (takes several minutes to be applied)
Grant-CsTeamsComplianceRecordingPolicy -Identity username@domain.com -PolicyName $PolicyName
#
# The granted policy can be verified by the following command
Get-CsOnlineUser | Where-Object {$_.TeamsComplianceRecordingPolicy -eq $PolicyName} | Select UserPrincipalName
#
Grant the policy to all the users in a department. Sales in this example
# Enable a department
Get-CsOnlineUser -Filter {Department -eq 'Sales'} | Grant-CsTeamsComplianceRecordingPolicy -PolicyName $PolicyName
# Verify
Get-CsOnlineUser | Where-Object {$_.TeamsComplianceRecordingPolicy -eq $PolicyName} | Select UserPrincipalName
#
If you want to enable everyone for recording you can do this one of two ways. You can of course do a Get-CsOnlineUser | Grant…
Another way is to add the recording application to the global policy. This means all new users automatically get the policy no matter what.
# Enable everyone
Grant-CsTeamsComplianceRecordingPolicy -PolicyName $PolicyName -Global
#
Step 6 – Install Verba
Installation instructions for a Verba Single Server solution
Download the media from support.verba.com -> Software Downloads -> (requires an account). I would recommend that you contact your Verint Verba account representative to set up a partner account.
Unzip to a folder and Run Setup

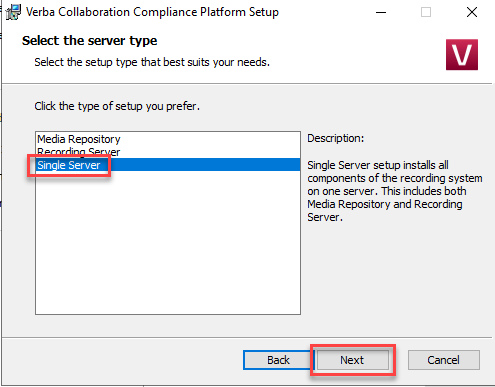
Choose Single Server solution with all components (Combo Install)
Choose SQL install (For a lab, SQL Express will do). For production you really need SQL Server. For guidance, see Server sizing and requirements -> Click Here
Then tackle all the prerequisites one at a time. The “Installer Pack” version includes all the prerequisites and the installer will take care of all of them.
Java Runtime (see below)
Next -> Accept Terms -> Next -> Next -> Install -> finish

Press Done, Please Verify

Visual C++
Accept Terms -> Next -> finish -> Press Done, Please Verify
SQL Express
Let it complete -> Press Done, Please Verify
WinPcap
Next -> finish -> Move to next
Windows Desktop Experience
Use the Server Manager
or PowerShell – run Install-WindowsFeature Server-Media-Foundation

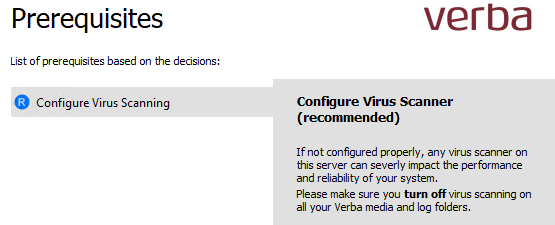
Configure Virus Scanning
Verify Time Settings

Use Separate System and Media Disk

Start the installer

Next -> Accept Terms -> Single Server -> Next -> Configure Media Disk -> Next -> Certs (Select Generate Certificate Signed by Verba Media Repo CA -> generate, complete the form) -> Next -> finish


SQL Server Connection
Verba install kit has installed Microsoft SQL Server Express Edition as a prerequisite, the password for the sa user is: Verba456+. Enter SA and the password and press test connection, which should pass

Then click execute to complete the execution script

Then close -> Next

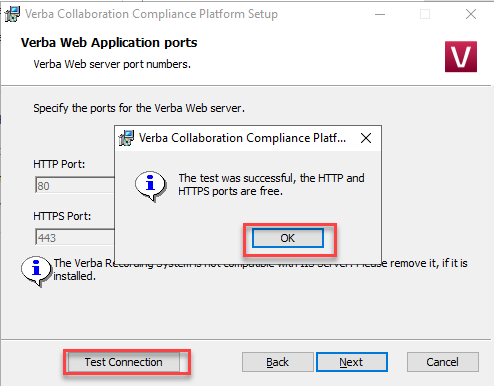
Web application ports
Click test connection to make sure the ports are free (they should be if this is a new, dedicated server) -> click next

Web App cert
Since this is a standalone server in the cloud, we need to use the public cert you created earlier so you can browse securely. If you have a PFX file, you need to export the cert as a crt and a key file. I use the Digicert Utility for this. You can do it how you like. OpenSSL for instance.
Here’s a post from Verba on how to do it
Once you have a CRT file and a key file. Browse to both and click next.

Select the local IP -> next

Select your Timezone -> next

Verba monitor
If you use Exchange Online, you can configure a relay connector to use here
Here’s an excellent post by Adam Bertrand a.k.a. Adam The Automator
⚠ Turns out that Microsoft block port 25 outbound from Azure Servers. So you’ll have to relay through something else such as SendGrid. I’ll update the post when I have that done.
From the above post, I’ll use PowerShell to create the relay
Connect to Exchange Online Powershell and run the following. One thing to change is the public IP of the server. Use the static IP you set in Azure earlier.
$splat = @{
## Define the name of the connector.
Name = 'SMTP Relay'
## Defined the type of connector to create.
ConnectorType = 'OnPremises'
## The set of sender domains allowed to relay.
SenderDomains = '*'
## Change this to your actual public IP address.
SenderIPAddresses = '81.25.65.140'
## Restrict the email relay only to your sender domains and sender IP address
RestrictDomainsToIPAddresses = $true
}

## Create the connector
New-InboundConnector @splat

Test the relay you connected
SMTP server is yourdomain.mail.protection.outlook.com
Change the from and to address
# Test the relay connector by sending an email
$mailParams = @{
    SmtpServer = 'lynciverse.mail.protection.outlook.com'
    Port = '25'
    From = 'verba@ucstatus.com'
    To = 'randy@ucstatus.com'
    Subject = ('SMTP Relay - ' + (Get-Date -Format g))
    Body = 'This is a test email using SMTP Relay'
    DeliveryNotificationOption = 'OnFailure','OnSuccess'
}

Send-MailMessage @mailParams

In my case, I received the email, but it was sent to junk. Make sure you whitelist it so you receive alerts in future.

Provide a target email address, a source email address and an SMTP server address (yourdomain.mail.protection.outlook.com) for system alerts. Then click Next

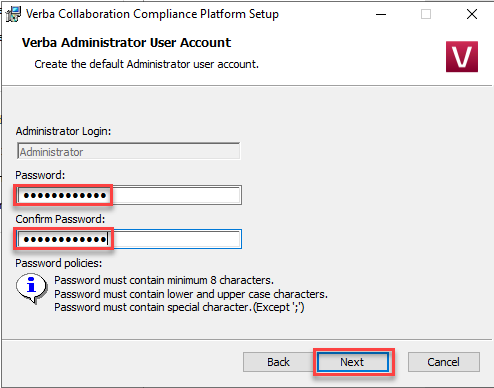
New create a Verba Admin account -> Click Next
New create a Verba API user account

Click Install

Click Finish

You can browse to your Verba server locally or from the interweb
Create a DNS entry to allow you to join using the wildcard SSL certificate you purchased for the bot. Create an “A” record for hostname “verba” pointing to the static IP of your VM. e.g. https://verba.yourdomain.com/verba/
The first screen you’ll see if the licensing screen


Step 7 – Configure Verba for Teams recording
The Verba Microsoft Teams Bot joins then streams the audio/video payload to the Verba Unified Recorder. The bot service listens for connection from the Unified Recorder on 10501 (TCP – Control) and 10502 (TCP – Media) ports.
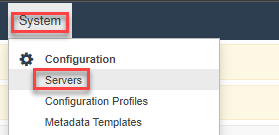
Go to System and Servers and Click on the name of your recording bot

Go to Change Configuration Settings -> scroll down and expand Unified Call Recorder -> expand Microsoft Teams -> click the + next to Teams Bot servers

Enter the details below

Press save

Scroll down to Microsoft Teams Bot and enter the following details:
Under General, set the following:
- Bidirectional/Stereo Recording: No
Under Microsoft Teams, set the following:
- Bot Service DNS Name: this is the long DNS name for your VM in Azure
- Bot Service CNAME: This is the CNAME that you added to point at the above hostname
- Service Certificate Thumbprint: Public SSL Thumbprint
- Bot Application ID: App ID for your Teams Recording Bot
- Bot Application Secret: Application Secret from earlier
- Microsoft Teams Tenant ID: your Microsoft 365 Tenant ID from earlier
- Public IP Address: The public address of this server

Then press save and execute the tasks to make the settings live

Now you need to activate and start the services. Again, System -> Servers -> Click on the recording bot name -> Service Activation
Now find Verba Microsoft Teams Bot Service & Verba Unified Call Recorder Service and you’ll see that the services are stopped and disabled. Click on the cogs on the far right to activate the services

Now you need to start the services. Go to Service Control and click on teh Play buttons next to the Verba Microsoft Teams Bot Service & Verba Unified Call Recorder Service to start the services

Now you should see that the services have started

Testing
There’s nothing else to configure in Verba to enable call recording. You don’t need to add users or connect to AD. The right to be recorded is controlled by the TeamsComplianceRecordingPolicy. If you grant that policy to a user, their calls will be recorded. The first call you make, you’ll hear a disclaimer that Microsoft adds to the start of the call, indicating that the call is being recorded.
If you want to see recorded calls, click on Conversations and Search

You’ll see a list of your recorded calls

Click on one of them to open up a page with more information about the call

To play the recording you’ll have to use a supported browser. Unfortunately, the only one that isn’t supported right now is Edge Chromium. But if you have the other Chrome, it’ll work just fine. Click on the play button to open up the player.

And that’s it! At least for now. I’ll publish a separate post for any follow up configuration of Verba itself.
Further reading

An extremely detailed guide on getting this working. I’m sure it’s going to be appreciated for years to come.
Thanks, mate.
LikeLiked by 1 person
Thanks James
LikeLike
Amazing stuff, Kudos Randy..
LikeLiked by 1 person
Thank you
LikeLike
Hi Randy, I am also working with Verint on this install at the moment for the CPS demo environment! It might be worth noting that your guide in particular the SfBO PowerShell commands are mostly relevant for pure online customers i.e. Teams with no on-premises / hybrid Lync or SfB Server infrastructure. My lab environment is SfB Server 2019 hybrid with O365 and I am unable to run the following command:
PS C:\Users\crossadm01.CLOUDDADDY> New-CsOnlineApplicationInstance -UserPrincipalname recordingbot@clouddaddy.co.uk -DisplayName “Recording Bot” -ApplicationId c4a7551a-2dcf-43b6-b3c6-9941054ffe5e
WARNING: Attention: On-premises domain must use on-premises cmdlet. Please copy and paste the below commands and run
them with appropriate admin privileges in your on-premises Skype for Business environment.
WARNING: New-CsHybridApplicationEndpoint -ApplicationId c4a7551a-2dcf-43b6-b3c6-9941054ffe5e -DisplayName “Recording
Bot” -SipAddress recordingbot@clouddaddy.co.uk -OU [A_VALID_OU]
This cmdlet is for online domain only. Please run corresponding on-premises cmdlets for on-premises domain.
+ CategoryInfo : InvalidOperation: (:) [New-CsOnlineApplicationInstance], InvalidOperationException
+ FullyQualifiedErrorId : Microsoft.Rtc.Management.Hosted.PlatformService.ApplicationInstance.NewCsOnlineApplicati
onInstanceCmdlet
+ PSComputerName : admingb1.online.lync.com
Hope this helps!
Cheers
Ben Cross
LikeLike
Thank you.
LikeLike
Reblogged this on Nguoidentubinhduong and commented:
How to set up Verint Verba Recording for Microsoft Teams
LikeLike
Hello
I have a few questions:
– What is the minimum version of Verint/Verba to get the MS Bot ? You say 9.5.0 but is it available under previous versions ?
– Were you able to configure the Verint servers as “Workgroup” servers or you had to domain join them in one of your Federated domains ?
– Were you able to protect the verint VMs with an Azure Firewall or App Gateway in front of it instead of using Public IP addresses ?
– What is the purpose of the SMTP ? Alerts only ? In case of a proof of concept, is it really required ?
Thanks and great document !
LikeLike
– 9.5.0 is the only version with the Teams recording bot
– I didn’t join the server to a domain. It’s not required for this to work. Joining to the domain would add AD lookups to Verba.
– I didn’t try any additional security other than the Windows firewall or NAT
– SMTP is used for sending alerts. I think it is also used for sending recordings and maybe reports. I’ll get around to documenting the fix for SMTP
Thanks. I’m glad you liked it.
LikeLike
For the certificate, if I don’t have access to a wildcard certificate, can I generate a certificate for the teambot and one for the web server ?
Or use a single certificate with common name as the teambot and Verba (web server) as subject alternate name ?
LikeLike
You just need to make sure the CN and SAN has the DNS name for the bot so you don’t get cert errors. I used a wildcard because I could.
LikeLike
Another quick question.
Do you know if the MS Graph right User.ReadWrite.All is really required ? I understand for User.Read.All, but I don’t understand for the ReadWrite one and the vendor doesn’t seem to require it.
Thanks in advance !
LikeLike
I just did what I was told. They say it is required. So that’s what I did.
LikeLike
Oh was just curious because the vendor doesn’t seem to say it is required .. just curious if you followed this procedure :
https://kb.verba.com/display/docs/Registering+the+Microsoft+Teams+Bot+in+Azure
LikeLike
Hi Randy,
Great post, very informative. Used it to sanity check our installation.
Currently having issues connecting through a Palo Alto firewall from Azure/Teams to the Verint Voice Recorder, if I bypass the PA it works, as soon as I introduce the PA recording stops. I have the 3 key ports configured as in your document but no luck getting it to work. Any suggestions would be welcome.
Sean
LikeLike
Thank you Sean. My advice would be run a trace on the firewall when you are testing and see what fails. It might be another port or IP or something.
LikeLike
Thanks for replying Randy, we see nothing being blocked on the traces, if we remove the PA from the equation it works, this is why I am reaching out.
LikeLike
Does it happen on every call type? Does it happen on the network, outside the network, at home, on mobile on Wi-fi and in 4G?
LikeLike
Any reasons to not add that server as a member of any domains? How it is expected to be managed? Company policies, and monitoring? How about antivirus products? I’m also interest to hear how this server works behind NATs? There should be no need to have this server available on the internet, only it is able to reach Teams MCU? I believe, many companies have lot of rules how to setups such a servers. Interesting questions are also, how about high availability and disaster scenarios.
LikeLike
Verint will have guidance on all that I’m sure.
No reason not to do workplace join to Azure AD and manage with Intune or whatever you want. AV will need consideration on file and folder exceptions.
I’d lock down the NSG as far as possible. Open to Teams and M355 ranges and any management services you use. Bastian or Team Viewer etc.
This single server build is just one of many deployment types. Consult the Verint online KB to get examples of more topologies. Including HA and HA/DR.
LikeLike
Hi @Randy, I really appreciate your every detail and content on this blog.
However, In case that I don’t use Verba, can there be another way to complete this?
What I mean is that I have to setup a Recording Bot in Microsoft Team that call listing and record all conversation occurring in the Teams. Is this possible? How to do that?
LikeLike
Since releasing this there have been several products released they do the same thing. Many are cloud based which means only a little bit of config is required to make it work. Numonix IXCloud is one
LikeLike