

Hello Readers,
I hope you are well.
A few years ago, I borrowed a Poly.com Trio 8800 with the Collab Kit for a few days of testing and I wrote a blog post at the time on what the Trio is, how to configure the account for it and how to set it up and use it. The post was written specifically for Skype for Business Server and Exchange Server.
And while I did follow this post up a few months later with another post written specifically for Skype and Exchange Online, I had a look and I can do better.
Not only that, so much has changed since 2017.
On with the show!
Background
You have or have ordered a Microsoft Teams Room and you’re itching to get it installed and set up so you can use it. The first thing you’ll need is an account to use to sign in to the device.
How you set up the account to use for your MTR (or your Teams enabled conference phone for that matter) is critically important. There are a lot of key details that you need to get right. While others are nice to have, but no less important in my opinion.
Anatomy of a Microsoft Teams Room account
The account you use isn’t a regular user account, however, there is a user account under it all. Otherwise, how would you sign in to the device?
The account is a Resource Account which is used with a Room Mailbox and enabled as a Meeting Room in Teams.
What you need
- Office 365 subscription with some licensed users
- Access to an account with the correct rights to set this all up. e.g. Global admin.
- A Meeting Room license
- You’ll also need to connect to Azure AD, Exchange Online and Skype for Business Online PowerShell
I’ll assume you have 1 and 2 already or you wouldn’t be here.
1. Connect to Online Services
I use my own script to connect to Online Services PowerShell modules. You can use your own method of course.
You’ll need to connect to Skype Online, Exchange Online and Azure AD
2. Verify that you have an available Meeting Room license
get-msolaccountsku
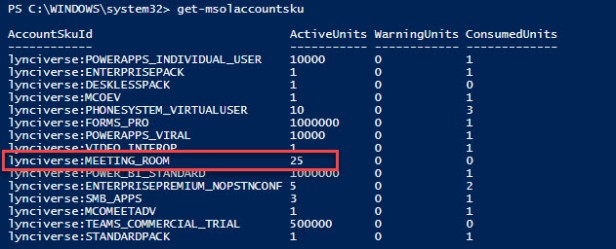
If you don’t have a meeting room license you’ll need to buy one. You can find the meeting room license in the Microsoft 365 admin centre under Purchase Services -> Other Services


Now that you have a meeting room license you can get on with the rest, using PowerShell.
3. Create the Room Mailbox in Exchange Online
Once again, this needs the Exchange Online PowerShell module. I’ll assume you’re connected.
Assign some variables to use throughout the process
#Variables
$NewMTR = “MTR_Home@ucstatus.com”
$MTRName = “Home Microsoft Teams Room”
$Password = “P4$$w0rd”
$Location = “GB”
$License = (Get-MsolAccountSku).AccountSkuId | where {$_ -like “*:Meeting_Room”}

Create the new room mailbox using the email address, name and password you specified above
New-Mailbox -Name $MTRName -MicrosoftOnlineServicesID $NewMTR -Room -EnableRoomMailboxAccount $true -RoomMailboxPassword (ConvertTo-SecureString $Password -AsPlainText -Force)

Set the account as password never expires and specify the account location
This uses the Azure AD PowerShell Module so I hope you’re connected
Set-MsolUser -UserPrincipalName $NewMTR -PasswordNeverExpires $true -UsageLocation $Location

UPDATE
Modern Authentication for your MTR account
Microsoft Teams Rooms now support Modern Auth. However, be sure to disable any Multi-factor or passwordless auth. You don’t want to have to authorise login every day after the scheduled reboot.
Assign the room the Meeting Room license
This uses the Azure AD PowerShell Module so I hope you’re connected
First, collect the UserPrincipalName of the room and assign to a variable. The reason I switch to the UserPrincipalName is becauese I got an error when I used the $NewMTR variable.
$MTRUpn = (Get-Mailbox).UserPrincipalName | where {$_ -like “*MTR*”}
Set-MsolUserLicense -UserPrincipalName $MTRUpn -AddLicenses $License

Configure the “MailTip” for the room mailbox
The MailTip will be displayed in Outlook when users are setting up a meeting that includes the new room mailbox (see below). You only have 175 characters, so don’t go wild.
Set-Mailbox -Identity $MTRUpn -MailTip “This room is equipped with a Microsoft Teams Room system. Please make it a Teams Meeting to take advantage of the enhanced meeting experience.”

Set the calendar processing with some key parameters and details
- Setting AutomateProcessing to AutoAccept means that meetings will be processed and accepted automatically if there are no conflicts
- Setting AddOrganizerToSubject to false ensures that the original subject is preserved and not replaced by the organizers’ name
- Setting the RemovePrivateProperty to false ensures that the private flag for meeting requests is preserved (private meetings stay private)
- Setting DeleteComments and DeleteSubject to false is critical and ensures that your meeting invitation has a “Join” button
- The AdditionalResponse parameters are there to send useful information in the message back to the requester
Set-CalendarProcessing -Identity $MTRUpn -AutomateProcessing AutoAccept -AddOrganizerToSubject $false -RemovePrivateProperty $false -DeleteSubject $false -DeleteComments $false -AddAdditionalResponse $true -AdditionalResponse “Your meeting has been scheduled in a Room which has been equipped as a Microsoft Teams Room . If your meeting was scheduled as a Teams meeting, simply tap the Join button on the in-room touch panel to start your meeting. If you haven’t scheduled it as a Teams meeting, consider changing this so you can take advantage of the enhanced meeting experience.”

There’s a lot more you can do including defining who can process and approve meeting requests and who can schedule them. See Set-CalendarProcessing for more information.
What else can you do?
There a new cmdlet that allows you to specify even more attributes for your rooms
“Use the Set-Place cmdlet to update room mailboxes with additional metadata, which provides a better search and room suggestion experience”. See Set-Place for more information.
Set-Place -Identity “MTRName” -IsWheelChairAccessible $true -AudioDeviceName “Yealink Wireless Mics” -VideoDeviceName “Yealink UVC 50”

As you can see, there are a bunch more attributes you can set including address details, building name and floor and capacity

Update
I did have a section about Enabling the room (enable-CsMeetingroom) but that’s no longer necessary
Meeting Room Voice Configuration
If you want the meeting room to be able to make calls to the PSTN you need to enable Enterprise Voice and configure a way for the user to place calls. If you’re using Calling Plans from Microsoft, you need to assign the user a calling plan license. If, on the other hand, you’re using Direct Routing through your own SBC or that of a Service Provider, you can grant the user account a Voice Routing Policy.
Set-CsUser -Identity $MTRUpn -EnterpriseVoiceEnabled $true
Grant-CsOnlineVoiceRoutingPolicy -Identity $MTRUpn -PolicyName “Policy Name”


Schedule a meeting
Once you’re done you can schedule a meeting and invite your room. Just enter the email address of the room in the required field.
The MailTip appears when you’re scheduling the meeting

The AdditionalResponse you configured earlier is sent back to the meeting organizer in the acceptance.

Wrap Up
I hope you found this useful. There have been a lot of changes since I wrote the other two posts, including Teams and Microsoft Teams Rooms, new versions of Exchange and Skype for Business. There are a few steps, but I think you’ll agree it is fairly simple to do.
That’s all folks!

Thanks for the link back Graham
LikeLike
Really nice guide! But how can I assign a phone number to the room?
LikeLike
Thanks for the kind words.
It’s a bit strange. But it has to be done before assigning the license. I’ll test and update soon
LikeLike
I have tried this workaround and it works! https://realtimeuc.com/2017/12/set-csmeetingroom-lineuri-error-cce/
But it’s a little strange that i can not assign the phone number via the command set-csmeetingroom
LikeLike
Great info, Randy! One note that has helped me:
The AdditionalResponse field supports some basic HTML formatting. I’ve always added some info on how to join a meeting, present content, use basic features.
LikeLike
Thanks Pat
LikeLike
Hi Randy,
An excellent article (once again). Two questions:
1. Any guidance on how to migrate existing MTR / SRS v2 devices already deployed (using CS-Meeting) on-prem to Teams?
2. Any update on support for modern authentication in Azure AD for MTR / SRS v2 devices?
Thanks!
Michael
LikeLike
Thanks Michael.
The device doesn’t need to be migrated. It’s all about the room mailbox and user account. You can either set up a new room mailbox in Exchange Online and enable it as per my guide or you can migrate a meeting room mailbox and account. To migrate from Skype for Business server to Teams, the account needs to be synchronized with Office 365. The room mailbox should be migrated to Exchange Online and the account will need the meeting room license.
For my money, I think it is easier to set up a new meeting room than try to migrate.
Regarding Modern Auth. There is no official roadmap for enabling MA on MTR. But I know MSFT is working on it behind the scenes. I definitely think it will be this year and my guess is in the first half.
LikeLike
Hi Randy.
I have some Crestron scheduling panels. I don’t have much experience on configuring them.
I can’t find a manual for them. Do I need to use same exchange account as the meeting room/mailbox to sign in the Crestron panel?
Any guidance will be appreciated
Thanks
LikeLike
I would definitely use the same account in most cases. Especially if you invite room accounts to meetings to book them. You’ll then see the free/busy of your meetings on the tablet outside the door AND on the MTR touch panel
LikeLike
Is it possible to use Microsoft Teams Meeting Room license on a regular desktop PC with Teams App installed? Instead of using specific hardware from
LikeLike
Yes. You can log in to the Teams desktop or browser client as the room account.
LikeLiked by 1 person
Hi Randy,
I have 2 Teams Rooms set up (and working). Now I need a specific user group to be able to see Calendar Entries of “Room 2”.
All Teams users are currently able to see only the “Room 1” Calendar.
How do I go about this?
Kind Regards
Gareth
LikeLike
It’s just an Exchange mailbox. So maybe add delegates to manage permissions. I’ve never tried it. I do know you can restrict who can book meetings in each room. But not hide it altogether
LikeLike
Can I use the Teams Room in a PC ? or do I need to buy a device?
LikeLike
No. You have to buy a qualified device
LikeLike